Sunday, December 28, 2014
Trilogies - I hate 'em - Part 5 - The Medium (Emily Chambers Spirit Medium Book 1)
Labels:
book review,
C.J. Archer,
Emily Chambers,
ghost,
literature,
series,
trilogy
I finished another book in the Paranormal 13 set. This one is about a woman who can see ghosts. As a general review, it was another book with a female lead character that got all lovey-dovey. The story was moderately interesting, and the "adventure" of defeating a minor demon was brought to a conclusion. The overarching character-development storyline seems to have an obvious solution that was not completed in the book, but the answer seems so obvious that it doesn't seem worth reading any more of the series for that story. I suppose the hints I picked up may be wrong, but still doesn't seem worth it. So, by the ruler of simply, "Did the book have a concise adventure that was completed, indicating that future books would have a chance of being concise adventures that could be read individually in no particular order", the series is fine. But, the story itself wasn't interesting enough to me, and there was too much "girl stuff" in it to be enjoyable to me.
Saturday, December 27, 2014
Otterbox belt clip repair
Labels:
belt clip,
diy,
metalworking,
otterbox,
welding

Read more if you care about the steps, with pictures.
New 18 foot gate frame
I've been welding on the gate for the rental property. I've used 1 inch, 11 gauge square tubing. The gate frame is 18 feet long, by 6 feet tall. I'll mount a wheel to it on one end, and weld up hinges in an uphill configuration on the other end. Pictures are below. I ground out the welds on the sides to help the boards sit flat when the pickets are mounted. I remembered after the first couple that the pickets won't actually touch the frame; only the 2x3 cross boards will. But I ground out the rest of the welds just to be consistent. Anyway, I stood it up and put a 4x4 under each end, then had my wife stand in the middle. It didn't bow much, definitely not enough to touch the ground, so we'll see how it does with all of the wooden pickets attached to it.
We bought the metal at the Fort Worth www.discountsteel.com retail store. I had them cut the 12 foot pieces in half so that I wouldn't have 10 feet of tubing sticking out of the back. Then I cut one piece in half to give me two 6 foot pieces to weld to 2 of the remaining 12 foot pieces. I don't have any way to mount them straight, so I laid them on the floor of my garage clamped to a 4 foot level on the side, then welded across the top. Before I flipped it to the next side, I ground that weld flat so it wouldn't interfere with the level. It worked out pretty well on the first piece. But I took too long on one side of the second one, and it bowed up. I might have been able to use another level and clamp across the bottom as well, but I don't know that I could have supported it well enough to keep it from bowing. Oh, well. It doesn't look too bad, and I don't need to be that picky.

We bought the metal at the Fort Worth www.discountsteel.com retail store. I had them cut the 12 foot pieces in half so that I wouldn't have 10 feet of tubing sticking out of the back. Then I cut one piece in half to give me two 6 foot pieces to weld to 2 of the remaining 12 foot pieces. I don't have any way to mount them straight, so I laid them on the floor of my garage clamped to a 4 foot level on the side, then welded across the top. Before I flipped it to the next side, I ground that weld flat so it wouldn't interfere with the level. It worked out pretty well on the first piece. But I took too long on one side of the second one, and it bowed up. I might have been able to use another level and clamp across the bottom as well, but I don't know that I could have supported it well enough to keep it from bowing. Oh, well. It doesn't look too bad, and I don't need to be that picky.
Wednesday, December 24, 2014
Trilogies - I hate 'em - Part 4 - Nolanders
Continuing my review of the Paranormal 13, I just finished the 9th book, Nolanders, Emanations Book 1. It has an interesting creation myth, and an unresolved storyline to justify the series-ness. However, the primary character ends up as part of a secret organization, so it's possible that the the future books could have a spy-series type feel, with the series storyline laid over that. I couldn't say for sure without actually reading the second book, but this first book did seem to have a concise adventure that was basically concluded. Of course, it could also be that I finished the book (and did most of the reading of it) late at night, and that I just WANT one of these series to actually be enjoyable. I'll let you know more if I get around to buying the second one.
Because I'm watching a TV show called "Chuck" right now, it is a good example of what I want in a series. There is an overarching story line of a rogue agent stealing intelligence data and sending it to an old friend. They slowly build why he stole it, why he sent it to that particular person, etc. But each episode is also an individual spy adventure. That's the kind of series I want to read. But if the entire series was just the primary storyline, without the side-quest adventures, it would be pretty boring.
Because I'm watching a TV show called "Chuck" right now, it is a good example of what I want in a series. There is an overarching story line of a rogue agent stealing intelligence data and sending it to an old friend. They slowly build why he stole it, why he sent it to that particular person, etc. But each episode is also an individual spy adventure. That's the kind of series I want to read. But if the entire series was just the primary storyline, without the side-quest adventures, it would be pretty boring.
Tuesday, December 23, 2014
Uphill Gate Hinges
Saturday, December 20, 2014
Trilogies - I hate 'em - Part 3
Continuing my review of free ebooks in regards to whether they are stand-alone adventures, and therefore part of a series worth buying, we start with the fourth book from the "Paranormal 13" set.
Saturday, December 13, 2014
Trilogies - I hate 'em - Part 2
My last post was a rant on the whole "trilogy" and overall "series" mentality of modern authors. Now, I'm going to start reviewing the recent ebooks I've been reading, almost exclusively from the perspective of whether I view them as stand-alone adventures or not. So, read below if you care.
Tuesday, December 9, 2014
Hard Cider
I've started some lazy-man's hard cider. Just 100% pure apple juice from the store, with a bit of instant yeast thrown in, and a balloon as an airlock. I don't drink, so I won't even be able to tell if it's any good or not, and will have to rely on my wife and friends. But if it comes up even reasonable, then I may look into juicing my own apples and trying a more authentic batch. It only takes a couple of months to age, so it may be one of the simpler alcoholic brews I can make.
I have another bottle I'm going to mess with later, but I'm just going for sparkling apple juice. I don't even remember what my point was with that at the moment. Since I already know I can carbonate a beverage from my ginger ale experiments, it's probably not worth the bother without fresh pressed juice, but it will be a quick and cheap experiment, I suppose. The only thing I really stand to learn is probably how the yeast affects the color, clarity, and flavor of the store-bought juice.
I have another bottle I'm going to mess with later, but I'm just going for sparkling apple juice. I don't even remember what my point was with that at the moment. Since I already know I can carbonate a beverage from my ginger ale experiments, it's probably not worth the bother without fresh pressed juice, but it will be a quick and cheap experiment, I suppose. The only thing I really stand to learn is probably how the yeast affects the color, clarity, and flavor of the store-bought juice.
Trilogies - I hate 'em
When I was younger, you could pick up a book by any author and read a complete story. What happened to that? The Hardy Boys, Sherlock Holmes, Pip and Flinx, they all were stories in a continuous universe, with characters that could grow as you read more books. But they were each stand-alone stories instead of weekly soap operas. Now it's hard to find any book that doesn't seem to be written from the get-go with the sole purpose of hooking you into buying the next book.
Wednesday, December 3, 2014
Another real quick inspection
Labels:
bee,
bee hive,
beekeeping,
bees,
honeybee,
queen bee,
supersedure,
winter cluster
I checked the bees again last week just to make sure I could find the queen. I was confident she was there because the brood I saw last time didn't seem to be drone, but I wanted to make sure. I did find her, but she was not marked. This could be simply that the paint as worn off, or it could be that she was killed and replaced toward the end of summer during the period that I didn't get a chance to check. If that's the case, it may explain the low hive population. (Long-winded explanation at the bottom.) I also got under the hive this week while it was cold and looked up
through the screened bottom board to see how big the cluster was. It is
probably only 2 to 3 frames wide. Even figuring that it did seem to go
from front to back, that's nowhere near the basketball or soccer ball
size that the internet says it should be. But, maybe Texas doesn't need
that large a cluster, and the small hive I'm seeing is normal. At least they are going through syrup well, when its warm, so
maybe they won't starve.
I did find that I killed 10 or 15 bees when I rearranged the combs. One of the honey combs was extra wide, and I didn't realize it when I put it on the outside edge. When I then had to shove everything over to get the last frame back in, bees were trapped between the wall and that comb.
I did find that I killed 10 or 15 bees when I rearranged the combs. One of the honey combs was extra wide, and I didn't realize it when I put it on the outside edge. When I then had to shove everything over to get the last frame back in, bees were trapped between the wall and that comb.
Sunday, November 9, 2014
Quick hive inspection
Labels:
bee hive,
beekeeping,
bees,
brood pattern,
hive inspection
I inspected the hive, quickly, to see if there was enough honey for
winter and to try to do a consolidation since it's supposed to freeze next week. I haven't done one since I flipped it over, but I was glad to see that the bees had all moved down to the bottom box. I didn't take a full count, Maybe half the frames have brood,
and it's not really consistent. So I couldn't think of a way to really consolidate them. One frame had nothing but 3 dead bees.
The bottom box had one frame of honey. The top box had about half the frames in
use, with 3 heavy, but still not fully capped. (And now that I think about it, that means that I flipped the boxes back over to get the brood on bottom and forgot about it, or the top would be at least all drawn out.) I moved them all to one side, since I think the fullest brood frames were on that side. (The hive has always been centered closer to the feeder than the actual center of the box). I'm going to make another jar of syrup later, so they can have a couple of days of quick availability if they want to gather it.
I only have the one hive, so I don't have anything to really compare to to determine if the hive is right or not. I went through it too quickly to look for the queen, and didn't have the camera on to search the pictures later. I saw capped brood, and one (but just one) uncapped larvae. I didn't see eggs, but I didn't really remember to specifically look for them either. The hive is supposed to shut down to an extent during fall to prepare for winter, but I don't know to what extent. We'll see how they do, I suppose.
I only have the one hive, so I don't have anything to really compare to to determine if the hive is right or not. I went through it too quickly to look for the queen, and didn't have the camera on to search the pictures later. I saw capped brood, and one (but just one) uncapped larvae. I didn't see eggs, but I didn't really remember to specifically look for them either. The hive is supposed to shut down to an extent during fall to prepare for winter, but I don't know to what extent. We'll see how they do, I suppose.
Sunday, August 31, 2014
Converting VB6 to Android: Die Roller - Finishing it off

Tuesday, August 26, 2014
Converting VB6 to Android: Die Roller - Basic to Java
Labels:
android,
convert to android,
convert vb6 to android,
d20,
dice roller,
die roller,
UI,
vb6,
vb6 android,
vb6 to android
We've got the project set up, and we've got a UI ready to go. So now we need to add some code to the button. We already have the routine from the last post, but all it does now is log a message. Now we're going to have that routine actually do some work.
Thursday, June 26, 2014
Brigadeiros - Brazilian Truffles
Labels:
brazil,
brazillian brigadeiro,
brazillian truffle,
brigadier,
chocolate,
recipes,
truffle

Tuesday, June 24, 2014
Converting VB6 to Android: Die Roller - UI
Labels:
android,
convert to android,
convert vb6 to android,
d20,
dice roller,
die roller,
UI,
vb6,
vb6 android,
vb6 to android

Sunday, June 8, 2014
Converting VB6 to Android: Die Roller

Thursday, May 29, 2014
Remodeling - Running wires, better than wire nuts

Anyway, as far as I can tell electrical code requires junctions to be in accessible boxes, so I used these single-gang outlet boxes. I couldn't find blank plastic face plates for the normal metal junction boxes, and I didn't want ugly metal plates. These will take a standard blank faceplate. They also attach from the front of the 2x4 instead of from the side, so no swinging a hammer in a small space, and the lip automatically aligns it to sit flush with the drywall when it is finished.
Wednesday, May 28, 2014
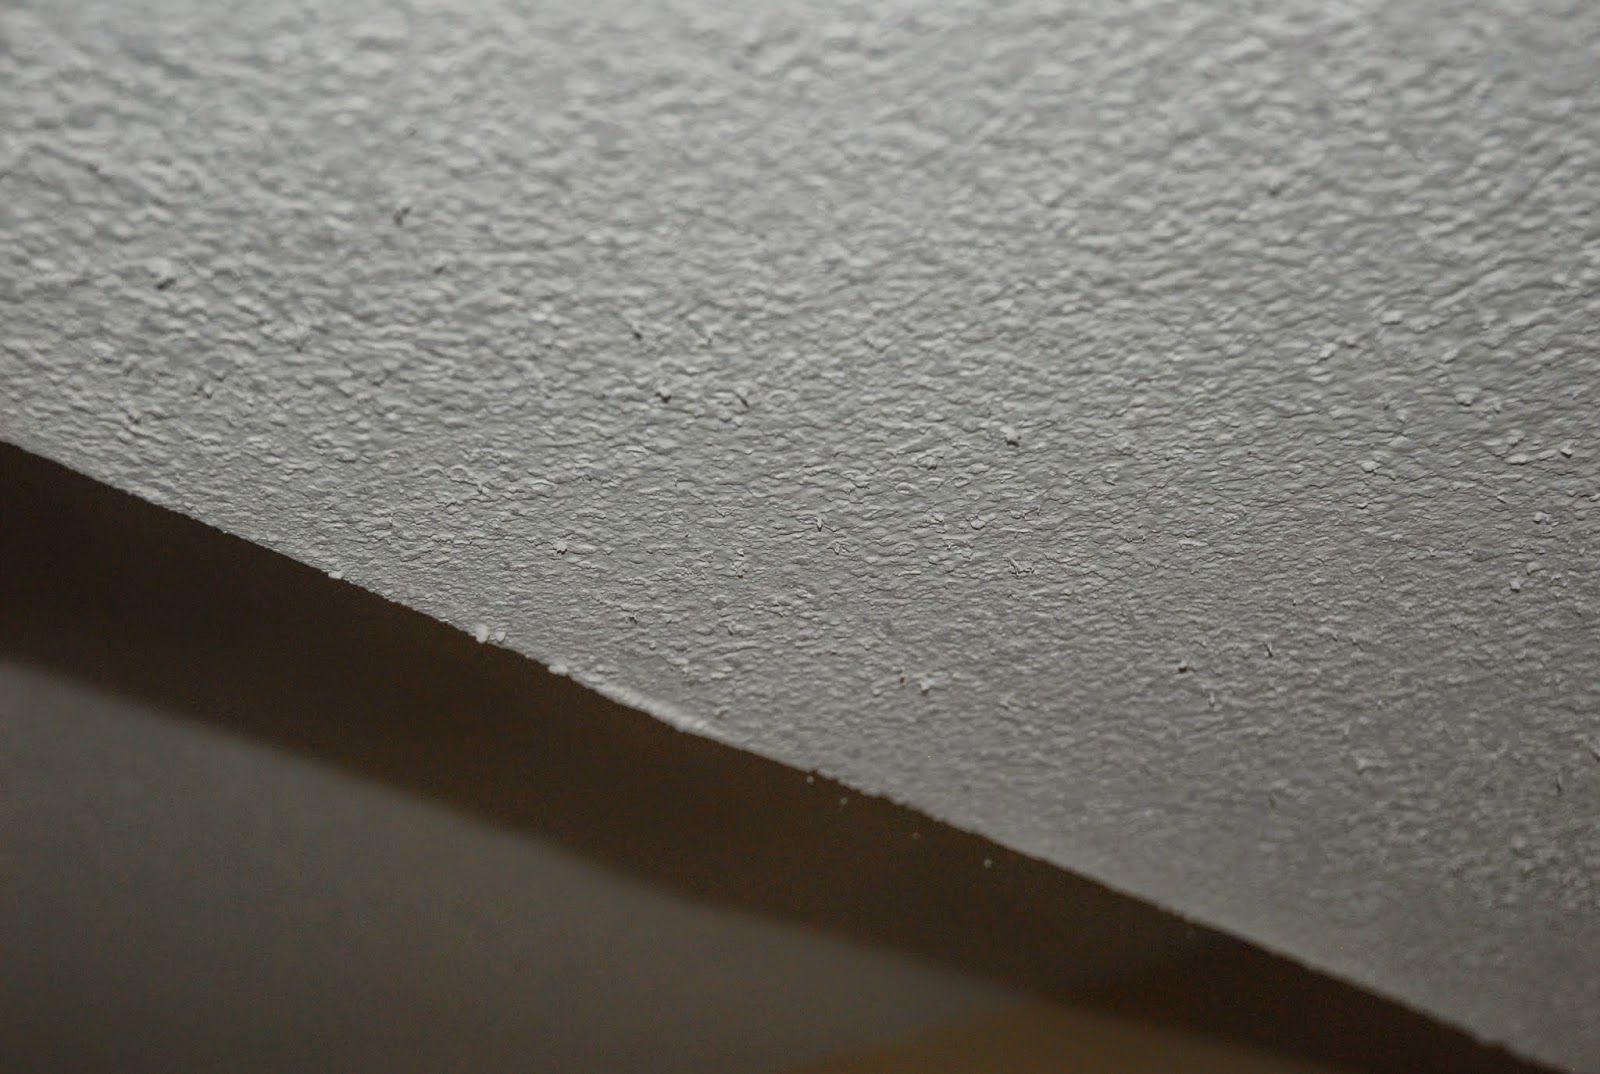
Getting rid of "popcorn" texture

 |
| The scraper we used |
Tuesday, May 27, 2014
Rearranged the hive - Sometimes the adventures suck

Monday, May 26, 2014
Ad: Harbor Freight, something I didn't know - Retroactive coupons
Labels:
advertisement,
affiliate,
coupon,
retroactive,
sale,
tool
FYI, I'm trying to do "affiliate marketing" as another possible line of small side income. With a blog that only gets 300 hits or so a month, I don't have a lot of hope, but that's standard with me anyway. I signed up for CJ Affiliate (used to be Commission Junction) and I only have to make one sale every 6 months to keep the account open. Of course, if I don't, they charge me 10 bucks and close the account, so I won't be out much if it fails.
Saturday, May 24, 2014
Burr comb and Queen Cups
Labels:
beekeeping,
burr comb,
foundationless frames,
honeybee,
queen cup

Thursday, May 22, 2014
My new theory on dogs burying stuff
I've developed a new theory on why dog's bury stuff; maybe they don't do it on purpose.
 These two dogs are monsters. The German shepherd, in particular, is a frisbee monster. She loves to chase them to the point that she can't help herself, regardless of how tired she is. I use it to give her exercises until she's to the point that she can't keep her tongue in her mouth. When we go in the house, she just flops in the floor, normally after splashing water out of her bowl to lay in. (Here, they were playing and biting each other, and I thought it looked funny.)
Anyway, the German, Ruby, loves to chase it, as I said, but she's also figured out that she can "throw" it for herself.
Anyway, the German, Ruby, loves to chase it, as I said, but she's also figured out that she can "throw" it for herself.
Thursday, May 15, 2014
Trinity Valley Beekeepers Association Potluck
I went to the Trinity Valley Beekeepers Association potluck on Tuesday. Not really a meeting, but I did get my questions answered. For one, I had forgotten that the queen mated with up to 12-15 drones (according to wikipedia). So she may have mated with one german drone or something and that's why I get a few dark bees. I was also told that even the pacakged bees probably won't kick out the drones until the summer dearth, so still seeing drones is also normal.
 I also finally found my queen. I was updating my bee log by going through the pictures and counting frames of brood vs honey, etc. while also checking for the queen again. Sure enough, I found her at the bottom of a frame, with her paint dot barely visible. I may not have seen her in the flesh, but I at least recognized her shape in the photo before I even noticed the dot, so that's something.
Wednesday, May 14, 2014
New ant proof hive stand
Labels:
acetylene,
ant proof,
bearing grease,
bee hive,
beekeeping,
bees,
boardman,
boardman feeder,
flux core,
flux-core,
fluxcore,
grease,
hive stand,
hivestand,
honey bee,
honeybee,
mig,
oxyacetylene,
welding
When I installed the screened bottom board, I also moved the hive onto a new ant-proof stand. I hadn't gotten a picture of it until now, so here it is.
 It is based off of a design here, or at least the idea of using high-temp grease in upside down cups instead of vaseline is. I don't trust pounding a single pole in straight, and my wife doesn't want anything pounded in at all, for fear of hitting a sprinkler line, so even two per end wouldn't work. So I welded a full frame up. I originally tried it with an oxy/acetylene welder, because I was out of gas for my mig, but the welds just wouldn't hold. They looked fine, but broke when I pounded on them. I finally remembered that I had some flux core wire laying around and used that. 1.5 hours per joint per attempt, several attempts over 3 days with the oxy welding, vs 15 minutes tops per joint with the flux-core. So even if the oxy welds held, I wouldn't use that for something I really needed done soon unless I absolutely had to.
Tuesday, May 13, 2014
Remodeling - Foundation Problems
Labels:
cracked casing,
cracked foundation,
foundation,
piers,
remodel,
rental property 1
Another problem we found with the house after we pulled the carpet is
a slight foundation issue. We new there were a couple of cracks on the
outside of the foundation, but the inspector thought they were probably
"surface cracks", since he didn't find any cracks running through the
brick. And we found doors that didn't close and one with a pulled-apart
casing(?), but it looked like the previous owners were trying to fix
things, and were just doing a lousy job. For instance, the door with
the cracked casing hasn't been painted yet and still has the label on it,
but doesn't fit in the frame. So maybe they bought a wrong sized door,
or hung it wrong, or something.
 But
now we find that one of the foundation cracks runs right up to that
cracked casing. So the casing may still be pulled apart because the
previous owners didn't know what they were doing or something, but it
may be that the reason they were fixing the door was because the
foundation had shifted enough to keep it from working anyway.
But
now we find that one of the foundation cracks runs right up to that
cracked casing. So the casing may still be pulled apart because the
previous owners didn't know what they were doing or something, but it
may be that the reason they were fixing the door was because the
foundation had shifted enough to keep it from working anyway.
Monday, May 12, 2014
Remodeling
Labels:
diy,
drywall,
foundation,
harbor freight,
header,
nail gun,
partition wall,
ramset,
remodel,
rental property 1,
sheetrock,
stud
We've recently bought a house to rent out and have been remodeling it. One of the things we are doing is splitting the master bedroom up into two rooms.
 The house smells like cat so the first thing we did was pull the carpet,
and then we found out that the master used to be two rooms, pretty much
the way we were going to divide it. In this photo, you can see the marks on the floor from the original walls, and the floor was apparently tiled. I've got two walls built, and sheetrock torn out for the end of another wall (a walk-in closet will go there). The open door leads to a hallway. So basically, we extend the hallway to the walk-in closet, with a door to the left (foreground) and a door to the right (background). The foreground room will have the new walk-in closet, as well as keeping the master bath. The background room will keep the existing, smaller closet. (The two leaning boards aren't supporting anything, they are just just leaned out of the way. I think they are the ones I cut for the top and bottom plate of the doorway to the background room.)
The house smells like cat so the first thing we did was pull the carpet,
and then we found out that the master used to be two rooms, pretty much
the way we were going to divide it. In this photo, you can see the marks on the floor from the original walls, and the floor was apparently tiled. I've got two walls built, and sheetrock torn out for the end of another wall (a walk-in closet will go there). The open door leads to a hallway. So basically, we extend the hallway to the walk-in closet, with a door to the left (foreground) and a door to the right (background). The foreground room will have the new walk-in closet, as well as keeping the master bath. The background room will keep the existing, smaller closet. (The two leaning boards aren't supporting anything, they are just just leaned out of the way. I think they are the ones I cut for the top and bottom plate of the doorway to the background room.)
Wednesday, May 7, 2014
Missing Queen, and Big Black Bee
Labels:
beekeeping,
big black bee,
brood,
brood pattern,
hive inspection,
honey,
honey bee,
honeybee

I got my camera back from my daughter, so it's easier to post pictures this time. I still need to pull other pictures off of my phone and my camcorder (if I can even find it) and when I do I'll go back and update the other posts. For now, here are some pics...
Switch to Screened Bottom Board
I want to leave an entrance reducer on to prevent robbing of my boardman feeder, while still leaving enough ventilation for the summer. So I replaced my bottom board with an SBB from plans at beesource.com last Sunday. I screwed up the dados, because 1) my tablesaw drifted up while making the second pass at the wide dado and 2) I mis-measured the second dado. So the sides don't sit right, don't meet well enough for glue to hold, and are only held on by nails. Also, the frame sits 1/8" too low, which I forgot about when cutting the back filler board, so I ended up with an extra entrance that I had to cover with mesh.

The only intentional difference from the plans is that I used 2x4 instead of 1x4 for the side rails. I'll get a picture of it soon, but they are crooked because of the crooked dados, so I'm probably going to add a front end board to act both as stop for the sticky board and to reinforce the side rails.
Once I got the hive on the new base, I tried to shake the bees from the old base into the hive, like when I installed them. Apparently, this only really works if they are wet, as they just ended up in the air. My wife got chased around the yard by one of them, so I figured it was probably a bad idea to also try to do a hive inspection. I did one today instead, and I'll post about that next.
I did move the hive onto a new ant proof stand and put the boardman back in front with an entrance reducer. I filled the now empty top box with 4 plasticell and 6 foundationless frames, figuring the bees should be about ready for it. The two center frames are plasticell, with foundationless outside of those, then plasticell again, and the final outer two being foundationless. I don't have starter strips or anything, so I figure the interspersed plasticell will help keep the combs straight.
Monday, April 28, 2014
Hive inspection 2
Labels:
beekeeping larvae,
bees,
hive inspection,
mite,
varroa
I did another hive inspection on Sunday. There are a couple of frames of capped brood and exposed larvae. There was also an odd frame with eggs away from the center, and I don't know what the deal with that is. The side toward the center is full of pollen, so maybe the bees filled the pollen for the upcoming brood, but then needed more space for eggs as the new frame was drawn out. I also saw one varroa mite crawling around. I'm going to have to hurry up and build a screened bottom board so that I can do mite counts and a sugar shake to see how bad they are. I didn't see any other than that one, but I probably just didn't look hard enough.
I was hoping to see honey this time, as the bees have slowed down on their syrup intake, and the flowers are blooming, but no such luck.
The cinnamon doesn't seem to deter the ants at all. It looks like they were staying out of the hive proper, but were climbing up the side and going through the gaps at the inner cover to get to the syrup on top. I have put a ring of petroleum jelly all the way around just below the cover. I had already done that around the hive supports, but it didn't work. Those supports are concrete blocks, and I think the petroleum jelly actually soaked into the concrete so the ants could still cross. I'm hoping the ants don't start going into the hive, and that the bees will keep get rid of them if they do. I'm also worried that the ants will have too much access when I build the screened bottom board. I may have to come up with a different hive stand so that the ants can be stopped before they get to the hive at all. Right now, the hive is sitting directly on a pallet, and that pallet is up on blocks.
Update: The petroleum jelly works, but won't stand up to heat. The sunward side of the hive appears to have melted and run. I'll have to wipe off the front tonight because I can't risk any of it running down to the entrance, which means the ants will be able to get back up. I did, however, find this forum post. The builder is using high-temp bearing grease in inverted PVC caps around metal pipes. I don't know how much I trust the inverted bit, though. Even if it stands the heat, it may not stand gravity forever. So I am thinking of using a double cap, a large inverted one above to keep rain out, and a smaller one below that isn't inverted to hold the grease. Better safe than sorry. I need to build that and the screened bottom board as soon as possible. It is going to get hot this summer, and the bees will need the ventilation, but if I move the feeder out front, I will need to leave the entrance reducer on to prevent robbing, at least until I know I have enough bees in the hive to be able to notice robbing.
First full hive inspection
Labels:
beekeeping,
boardman,
cinnamon,
hive inspection
I did my first full inspection today. I saw a lot of pollen, and a lot of syrup stores, but not any honey. Of course, it's possible that I'm mistaking honey for pollen, but I don't think so. For one thing, none of the capped cells looked like they had anything dark in them, which means it was all syrup. I did find the queen though, and saw cells with eggs, and those cells were clustered properly. I didn't see any lavae, and I'm pretty sure I'm supposed to see larvae by now, but maybe I'm wrong.
The frames with eggs weren't centered in the hive, though. I think they were centering on the boardman feeder off to one side instead. I've never heard of that before, but maybe it's normal. I put the boardman inside on top of the inner cover and put an empty body on it to keep it from the ants and robbers, and I removed the entrance reducer. It looked like the bees were getting congested trying to get through it, so I thought it may be doing more harm than good.
I checked on them again tonight to fill the feeder, and there are ants on it already. I'm going to probably try cinnamon tomorrow, but I'm afraid of getting it on the bees; I'm not sure what it will do.
Friday, April 18, 2014
Might have some robbing going on.
Labels:
beekeeping,
bees,
entrance reducer,
robbing
I refilled the bees' feeder today and they acted weird. There were quite a few bees milling around at the entrance, which they normally don't do. Normally, they are clustered to the end of the entrance toward the feeder. They come and go from there, which I still think is a little odd. I would think any bees feeding there wouldn't be going out anywhere, but would just be going back into the nest. But maybe they get used to going there when they feed, so they go there when they leave anyway, or something.
Anyway, they were milling around the center of the entrance, and when I put the feeder back on (my wife had taken it off before I got home, so it had been off for a couple of hours at least) a lot of bees came out and covered the bottom of the hive body above the entrance. I've never seen them do that. I thought I might have just upset them, but it seemed they had to have already been upset about something anyway, so I watched them. I didn't see any of the wide-spread fighting that I've seen on youtube with robbing, just a couple of "disagreements" that I thought may have just been brought about by a bad landing. But eventually, I'm 99% sure I saw a bee leave carrying pollen. So I cut one of my entrance reducers down so that it would fit in place with the feeder on. I cut the end with the large gap, so I could put the small gap toward the other end of the entrance. I don't know if there actually were robbers or not, but it looked like that confused all of the bees, but they seem to bee fine now. Of course, it's night now, and the few that are outside of that small hole are still more than are normally out at night, so maybe either it annoys them, or they are watching for robbers.
The gap I'm using is only big enough for a couple of bees to go through at a time, so even though my hive isn't very strong, they should be able to protect themselves. And this weekend I am doing a full hive inspection, so I'll move the feeder inside when I do and put an empty box over it. I've been planning that anyway, since I've been getting sugar ants lately.
Thursday, April 10, 2014
Bee update
Labels:
beekeeping,
bees,
boardman feeder,
sugar syrup,
syrup recipe
Last night, I gave the bees the reserve syrup I had made. Today was nice and warm all day and when I got home, the jar was completely empty. I'm going to make up a couple of batches tonight, but my wife isn't going to be willing to refill the one feeder jar we have, so it will still have to wait until I get back unless I start putting it in a different container. I'm not going to make a 5-gallon bucket worth, but I do have a spare pot the dogs have been drinking out of that I might could use. I'll have to see. The main problem will be making a floater for it to keep them from drowning. I made one out of a scrap piece of plywood I had laying around for a water pail I set beside the hive. Sticks and such weren't working, and we'd see 1 or 2 drowned bees a day. None since I put in the floater. I just used the bandsaw to cut it round almost the same size as the pail, and then drilled holes all over it.
Anyway, I reflilled the jar today with another 350 grams of sugar and water. Interestingly, I measured what I poured into the jar after it cooled, and it was something like 682 grams. It seems like a lot to me that nearly 20 grams of water would have evaporated, even considering that some of the syrup was still clinging to the inside of the pot after I poured it. But, maybe not. Regardless, it probably means I need to keep track of just sugar weight instead of syrup weight in the log. The purpose is to determine 1) how much I need to make over a given amount of time, and 2) how much it costs me. The difference in sugar is greater than that for water, so I'm better off ignoring the water that evaporates than using an incorrect total weight. Of course, at least with the total weight, I would end up overshooting instead of undershooting, but I'll worry about that later if I have to.
I've also decided to keep a single blog post as a constantly updating bee log. That post is here: Beehive Log.
Tuesday, April 8, 2014
Beehive Log
Labels:
bee log
Hive 1:
Faces North in south clearing of back yard.Currently consists of two 10-frame dadant "hive bodies" (I don't know if this is officially a deep or medium). Bottom is all plasticell foundation and has 6 of 10 drawn out. Top is 4 plasticell and 6 foundationless, with the center two being plasticell and the 2 outers being foundationless.4/3/2014: Installed 3lb italian package from rweaver.com
4/4 - 4/5/2014:Refilled boardman feeder 4/4 and 4/5/2014, unknown quantity of 1:1 syrup (dogs knocked it over, skewing measurements).
4/7/2014:Refilled boardman feeder with 704g 1:1 syrup.
4/8/2014:Refilled boardman feeder with remaining 550 grams of shipping syrup, thicker than 1:1.
Made 772g of 1:1 syrup in reserve.
4/9/2014:Refilled feeder with 772g syrup I made yesterday.
4/10/2014:Warm day, feeder was empty after work, made another syrup of 350g sugar and water and refilled feeder.
4/11/2014:I was out, but my wife made syrup and fed the bees. 625g sugar and water
4/12/2014:Bottle emptied out again, I refilled it with 469g sugar and water.
4/13/2014:Mixed 1053 grams of sugar and water and refilled the bottle (didn't measure exact amount filled, since my "post mix" measurements don't seem to match up anyway.
4/15/2014:Mixed 2435 grams of sugar and water. The previous 1053 is gone. I used a larger jar and found that half water and that much sugar doesn't come close to actually filling the jar. I need to see if I can find a formula for the volume of a solution if I want to try to end up with the amount that would fill the jar.
4/18/2014:Saw possible robbing, so I put an entrance reducer on to shut the entrance down to the smallest gap (about 1 inch across)
4/19/2014:Did a full hive inspection. No larvae, but a couple of frames with eggs. Lots of pollen and syrup stores. Nothing recognizable as honey to me, although I could me mistaking some honey for pollen. But any capped stores I found appeared to be clear below, not honey-colored.
4/27/2014:Full hive inspection. Larvae and capped brood in several frames. One weird frame with eggs away from the center and pollen on the other side. Perhaps pollen was stored for the upcoming brood before the other comb was drawn, and that comb was used to lay the next set of eggs. 6 of 10 frames drawn, so I didn't yet place an additional hive body for expansion. Refilled the jar with the last of the 2435 reserve syrup. The bees are not feeding as fast with the syrup inside, and I don't know whether it is a congestion issue or not. If I make an ant proof hive stand, I will probably move the feeder back out and leave the entrance reducer in place. I made 3105 sugar grams worth of syrup, which basically fills the current "bear" storage jar. After heating and dissolving, came out to be 6174 total grams of syrup. Probably about right after spillage.
4/4/2014: Replaced the bottom board with a screened bottom board, put the hive on a new hive stand made out of 1" galvanized pipe with high-temp grease ant block, moved the boardman back out front with an entrance reducer, and filled the extra top box with frames, alternating foundation and foundationless. Bees were too agitated to do a full inspection
5/7/2014: Full inspection. Didn't find the queen (update, found the queen in one of the photos), but found several frames nearly completely filled with brood. Still only at 6 out of 10 frames drawn, though, so the extra box of frames is probably early. No ants are present, so the new hive stand is working, but even with the boardman out front, the bees are not taking it as quickly as they were. I don't know whether it is because comb drawing has slowed down, or they are taking more nectar and not needing the syrup as much.
5/15/2014: The bees finished the 3105g syrup, and I have made another 3105g batch. After processing, it weighs 6163g, which divided by 2 would be 3081. I can believe that may be evaporation during heating. That would mean, technically, that I have 3105g sugar and 3058g of water, so instead of 1:1, it is actually 1.054:1 or so. The bees are taking about 1 quart per day again. I don't know if it is 1) the rain has been keeping them from foraging, 2) they like the feeder in front better than on top, or 3) they had almost filled the original body and were out of a comb building mode, and have now realized there is a complete empty box above to be filled. I went to the Trinity Valley Beekeepers Association meeting, and one of the members said they suspected the full nectar flow may kick in after these rains, so we'll see if the bees keep taking syrup at this rate.
5/17/2014: I did a hive inspection again, and the bees have been building come up from the bottom box. A couple of foundation frames had comb drawn, but there was also a large (4 inch across, probably) saucer shaped burr comb growing upward from the top of the bottom frames into the space of a foundationless frame. I have taken out the burr comb, taken off the top box, and moved the still unfilled outer four frames in the bottom box closer to the center. Hopefully, those will get filled out. Next week, I will put the empty box on again, but I think I will rearrange all of the brood comb, and the queen, into the top box, put the honey combs in the bottom box, and let them work down instead of up. If the queen/hive wants, they can eventually move back down into the bottom body. I won't have any honey this year, and probably won't even put on a super, so I won't have to worry about her migrating further up and laying in the honey supers.
5/23/2014: The bees finished another 3105 sugar grams of 1:1 syrup. I made reserve with 3105g of sugar, but the scale died for some reason before I could get quite to 3105g of water. I poured in a bit more that should be close, but it's not exact.
5/23/2014: Another 3105 emptied, another 3105 reserve made.
5/27/2014: Added the empty box back to the bottom.
5/30/2014: Another 3105 emptied and made. I think they are going through slightly more than 1 quart per day right now.
6/10/2014: Another 3105.
6/11/2014: Inspected the hive, found the queen. Pictures in review for counts, but at least 2 foundationless frames were filled. One was attached to a foundation frame with burr comb from the side and was ripped out. Queen and majority of brood are still in the top box, and bottom box is still being filled out. At least one foundationless frame was completely empty, with comb from an adjacent frame grown out thick enough to fill in the gap.
11/9/2014: Inspected the hive, quickly, to see if there was enough honey for winter. I didn't take a full count, Maybe half the frames have brood, and it's not really consistent. One frame had nothing but 3 dead bees. The bottom had one frame of honey. The top box had about half the frames in use, with 3 heavy, but still not fully capped. Since so many frames on top were only barely drawn out, it means that I flipped the boxes at some point and forgot to log it.
11/12/2014: 676g sugar in 1:1 syrup. It is currently too cold for the bees to leave the hive, so I have not put it on yet. This made slightly more than 1 quart (maybe 1/8 quart more) and that has been saved in a separate jar.
11/19/2014: I shook about 16 ounces of powdered sugar (all that was left of a bag we had) into the hive. I've found a website that suggests doing that every week for 6 weeks to break the brood cycle on varroa, so I'll keep that up. If nothing else, it will give the bees an extra source of food in the hive if it stays too cold for them to get the syrup. They have used all 676g of syrup as well, and we made another 1260 grams.
11/26/2014: Another sugar shake, this time with 456g of home-made powdered sugar and a quick inspection. I did find the queen.
12/3/2014: Another sugar shake. Only 226 and I only shook the bottom body to keep from opening it too long. The bees have finished the 1260 grams and are working on 973g
Totals
| Queens | 1 |
| Packages | 1-3lb |
| Sugar (in syrup) | >24104g in 1:1, plus shipping syrup. (currently feeding 973g reserve) |
| Sugar (powdered for shake) | 682g home-made, plus ~16oz store bought |
Frames
10
Honey Frames (capped/uncapped)
1.5/.5
Brood Frames (capped/uncapped)
2.5/.5
Drone Frames (capped/uncapped)
0/0
Harvested Honey (lb)
0
Harvested Wax (lb)
0
Slumgum (lb)
0
Checked on the Queen today
Labels:
beekeeping,
bees,
boardman feeder,
package bees,
rweaver,
syrup recipe
I checked on the bees today, and the queen is out and I found her, and they are making nice comb (to me anyway). I didn't look around a lot, as it is still chilly and windy, and I didn't want to leave them open longer than I had to. I took out the can and took off the extra deep (or medium, I don't know which) and put it back together.
I made another 3 cups or so of syrup today. 386 grams each of sugar and water, to be exact (might as well be). Oh, and yesterday was 352 grams each, I believe. The bees needed feeding, but I ended up not using any of it. The can still had 550 grams total of syrup in it. I poured it in the jar instead, and I'll save the syrup I made today. I'm going to have to start making this in bigger batches, and get a bigger feeding method. If we had installed this package at our other property like my wife wanted, they may not have lived, because I'll only be able to check on them once a week (or maybe, they would have lived, but not done as well). I've read some places that say you should feed all of the first season after installing them. I was going to ask about that at a bee club meeting we were going to go to tonight, but we had other things to do.
I'm wondering if the concentration of the syrup is why there was so much left in the can. Of course, the can also only has 3 holes, so maybe it was just too hard to get out (especially since all 3 holes may have been covered the way I put the can in, which is why I put the boardman on in the first place). So we'll see how fast the level drops tomorrow.
Monday, April 7, 2014
Beehive update
Labels:
beekeeping,
bees,
boardman feeder,
package bees,
rweaver,
syrup recipe
I've decided to use this as a bee log for now. We've just gotten our first hive set up, and if we're going to do any of it for profit, I need to make sure I keep track of as much of it as I can, so I'll do that here. It will allow me to keep track of which hives do the best and what factors may affect that. It will also allow me to keep track of when a queens productivity may be dropping so that I can swap her out.
We ordered packaged bees from www.rweaver.com. 3 pounds of italian bees and a clipped and marked queen were delivered on April 3rd. The installation went as planned, with no stings (with no safety equipment on, to boot). I have a 10-frame deep on bottom and an empty deep on top to cover the original can of syrup. I had the original shipping box in there as well, but decided it may be too tempting for the bees to build comb on, so I took it back out later that day. I still didn't get stung, but later I want to check again to make sure they were leaving the box, and got stung half-way back to the house. I noticed there were a few bees outside the hive entrance that appeared to have their abdomens raised and were fanning their wings. When capturing swarms, I've read this is a sign that you have got the queen, so maybe they had already accepted the queen at that point and had started protecting the hive.
I put 3 cups of 1:1 sugar syrup in the boardman feeder today. I've put syrup in 2 other times, but the dogs knocked it over, so I don't know how much the bees ate and how much the dogs did or may have spilled. But they are drinking it fast; the last batch was half gone in just a few hours on Saturday. Sunday and today were too cold for them to get very active, though. It finally warmed up this evening, but I haven't checked how much syrup is gone yet. (I think the dogs have gotten used to it and will leave it alone, but if they don't, they'll learn once the weather starts staying warm. Ginger, the small one, was doing something weird with her mouth all Saturday and kept eating grass and throwing it back up. I think she got a bee in the throat or mouth, but we couldn't find a bump. She didn't have a problem breathing, I think it just irritated her enough to make her throw up to get rid of it.)
Tomorrow, I get to open it up and make sure the queen is out of her cage, and that the bees have started building comb, and I'm looking forward to it. I'll also pull off the top deep and get the can out, which should be empty, and get the hive down to a more manageable size for the bees. It will make it easier for them to maintain the environment, and will keep them from building comb on the lid. I won't add another body section until they have most of the frames filled and enough bees to cover them.
- So, April 3rd, installed 3 lb italian bee package. Hive is facing north and is in a small clearing in our yard. I hadn't actually realized that it was facing north until just now, so I will probably turn it before winter gets here. The clearing is small enough that it probably won't get any good wind going in, but it shouldn't hurt. The reason it is facing that way right now is simply because east-west was the most level, and facing it north-south let me tilt it slightly forward to drain moisture.
- April 4th and 5th, filled syrup bottle on boardman feeder with 1:1 (but lost track of amounts, as dogs spilled it)
- April 7th, refilled syrup jar with 3 cups of 1:1 syrup.
Subscribe to:
Posts (Atom)